I. Introduction
1. Bottom-up design: starts by identifying specific features that we’ll need in our program, and then writing functions that accomplish these specific features.
2. Top-down design: starts by looking at the big picture of what the end result will be, and then breaks it down into smaller steps after that.
II. Bottom-up Design
We need to first think of some small pieces of functionality that would be useful for our program. We can implement these pieces as functions.
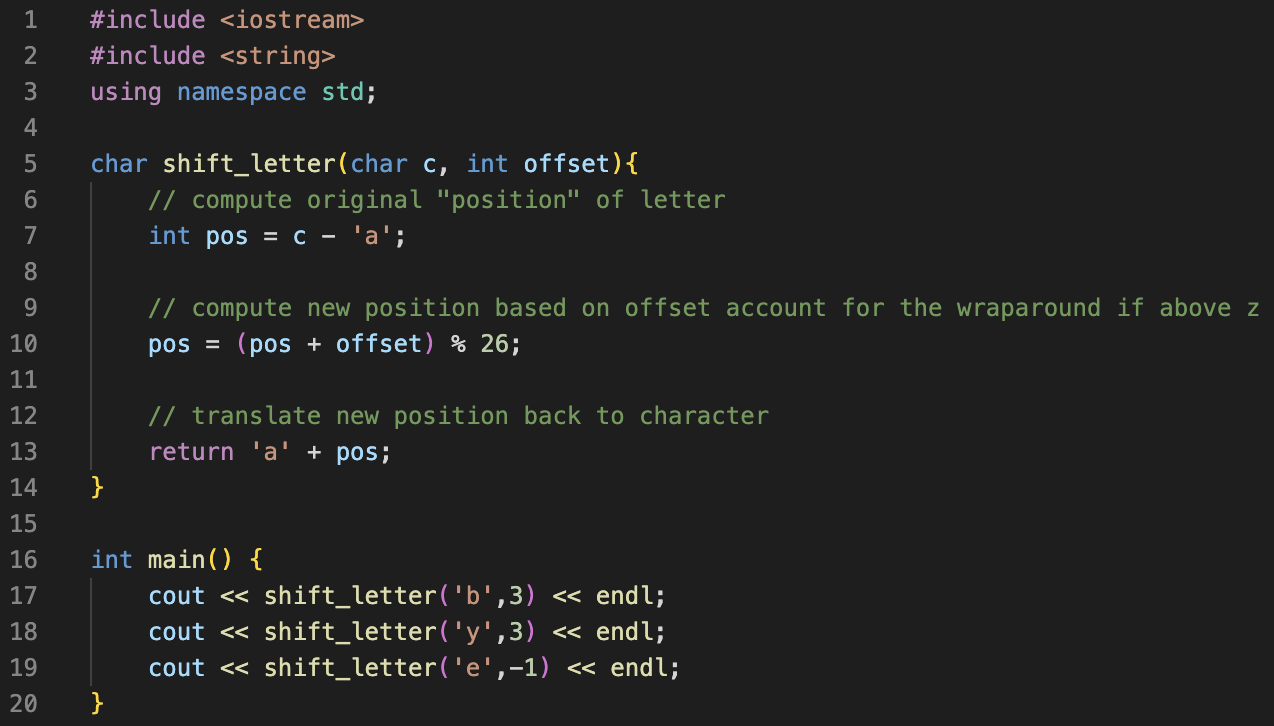
1. Bottom-Up Design: Shifting a Character
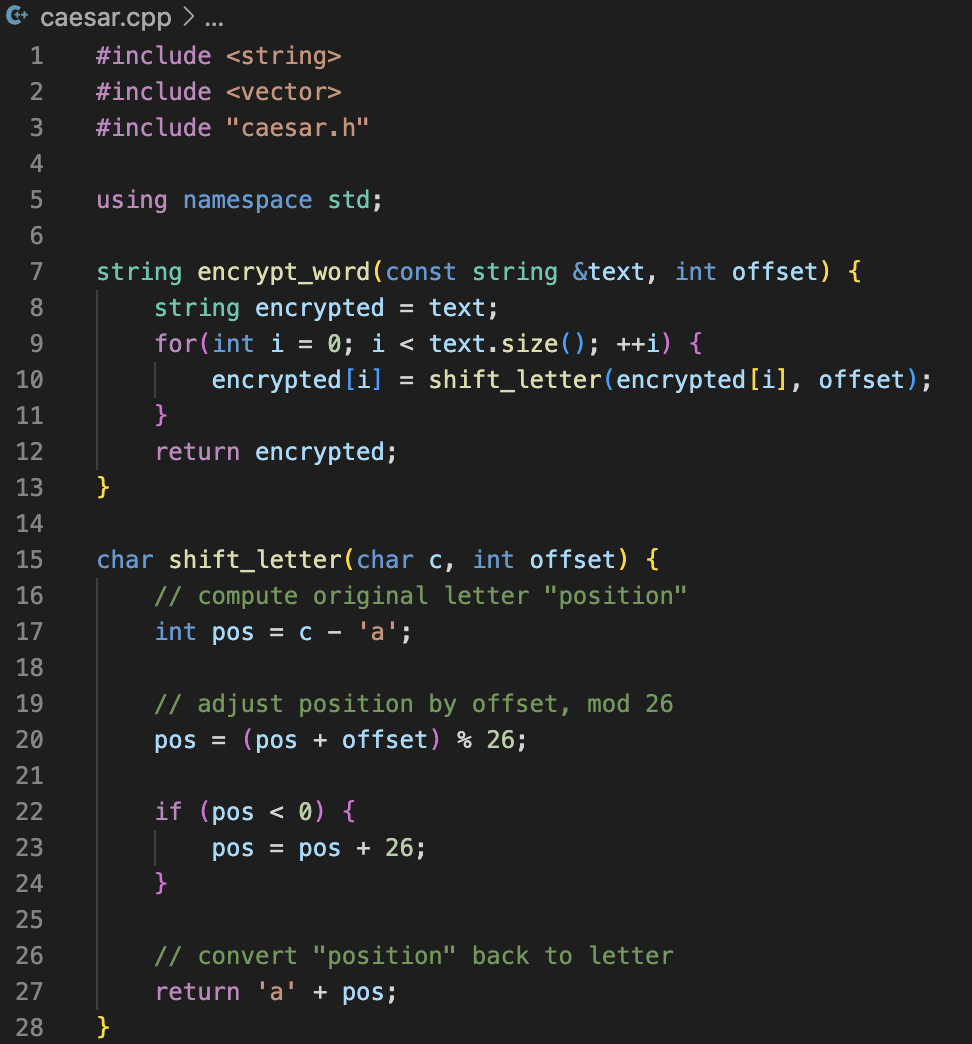
Create a shift_letter function that takes in an original character, shifts it by a given amount, and returns a new character.

2. Bottom-Up Design: Encrypting a Word
Write an implementation for the encrypt_word function below that encrypts a word according to a Caesar Cipher with the given offset. Iterate through each character in the word and call shift_letter() to compute a new word.


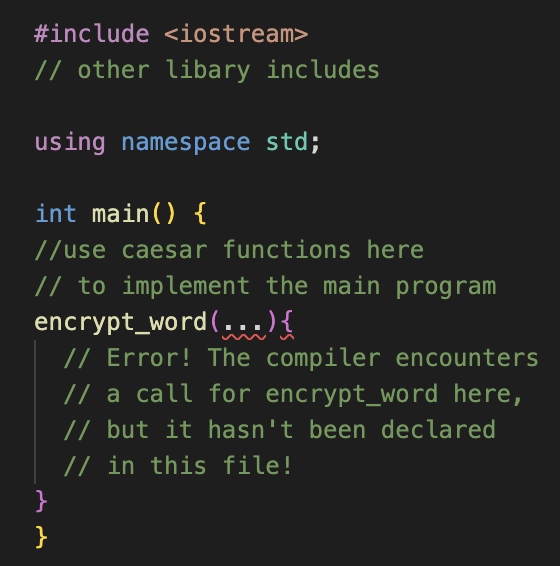
3. Multi-File Program Structure
(1) We can split our code into separate modules:
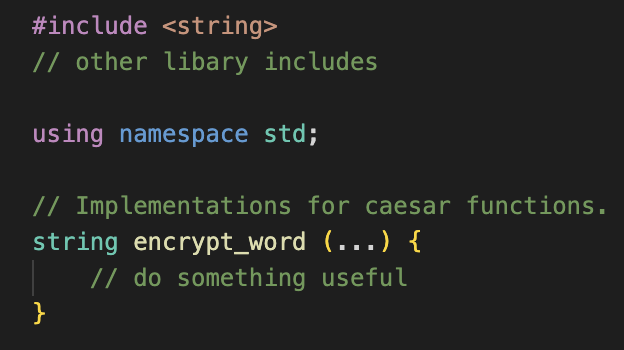
- caesar.cpp: contains functions for encrypting/decrypting via a Caesar cipher. The functions are generally useful and could potentially be used in many different projects.
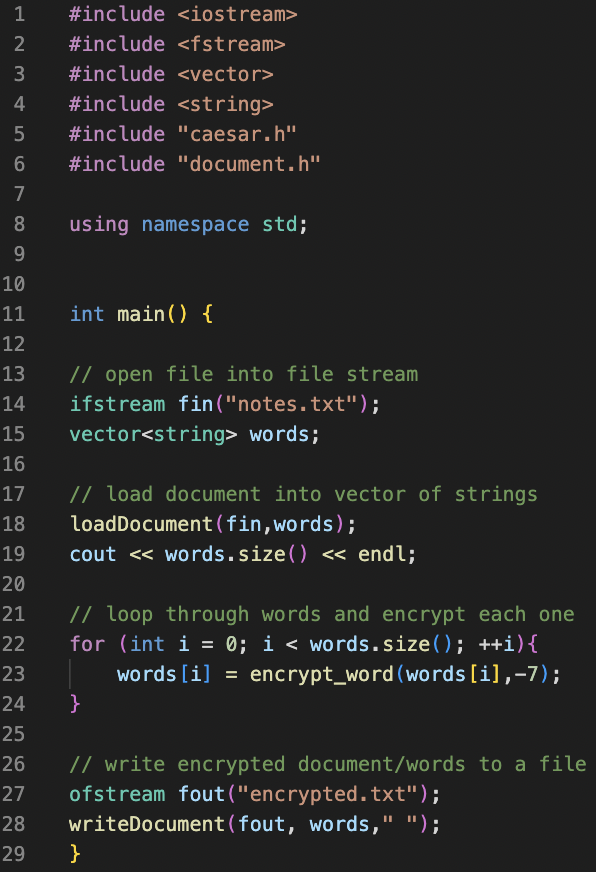
- encryptFile.cpp: the main driver program. It takes care of opening a file, calling functions from caesar.cpp, and writing output.

=> g++ encryptDocument.cpp caesar.cpp -o encryptDocument
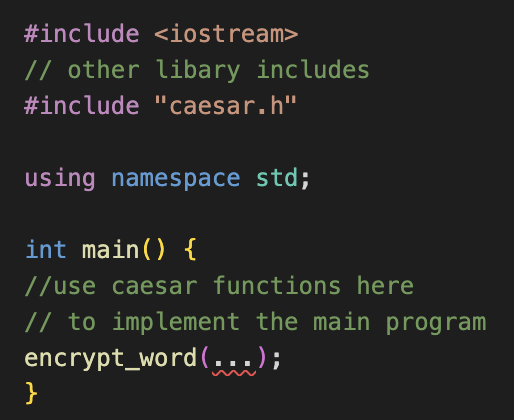
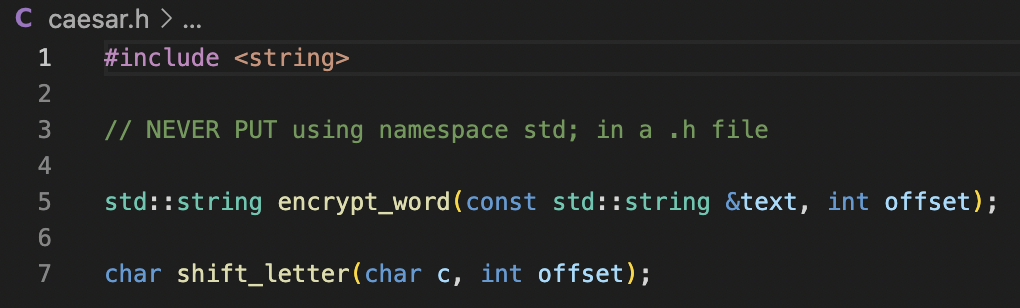
(2) Add a file called caesar.h
- This is a “header” file because we will include it at the top of other files.
- Use <> for libraries, use “ “ for the file name.

=> g++ encryptDocument.cpp caesar.cpp -o encryptDocument
1. A module: contains a specific set of functionality in your code.
(1) usually consists of a .cpp file and a .h (header) file.
- The header file will contain function prototypes, the .cpp file will contain the implementations of these functions. For convenience, the .cpp file will generally include the header file at the top (ex. #include "caesar.h").
2. A program with multiple modules will also have a driver file, a .cpp file that contains main().
3. If a particular .cpp file (including the driver file) needs to use functions from a module, then the header file for that module must be included at the top (e.g., #include "caesar.h"). This gives the compiler access to the function prototypes in that module. Note that .cpp files should never be used in an #include.
To compile a program with multiple modules, all of the .cpp files must be specified in the compilation command. Header files are never specified in the compilation command.
Ex)
g++ encryptDocument.cpp caesar.cpp -o encryptDocument
EX) Organizing Autograder Program
We had a whole bunch of helper functions dedicated to pulling data from the autograder, as well as a main function that calls those functions on data pulled from a variety of sources.
Which of the following is a reasonable organization for our project?
A. Put the main() function in a file grades.cpp. Put the helper functions for the autograder in a file autograder.h, and then use #include 'autograder.h' at the top of grades.cpp to bring in those functions.
B. Put all the code in a single file, grades.cpp, since this is the only way to ensure the compiler has access to the helper functions while it is compiling the code in main().
C. Put the main() function in a file grades.cpp. Put the helper functions for the autograder in a file autograder.cpp, with a corresponding autograder.h file containing prototypes for those functions. Then, use #include 'autograder.h' at the top of grades.cpp to ensure those functions are declared before they are used in main().
D. Put the main() function in a file grades.cpp. Put the helper functions for the autograder in a file autograder.cpp, and then use #include 'autograder.cpp' at the top of grades.cpp to bring those functions into grades.cpp as well.
Answer: C
EX) Compiling Autograder Program
In our example grading program, we have three files:
- grades.cpp
- autograder.h
- autograder.cpp
Which of the following compile commands is correct?
A. g++ grades.cpp -o grades
B. g++ grades.cpp autograder.cpp -o grades
C. g++ grades.cpp autograder.h autograder.cpp -o grades
Which of the following compile commands is correct?
Answer: B
4. File structure demo
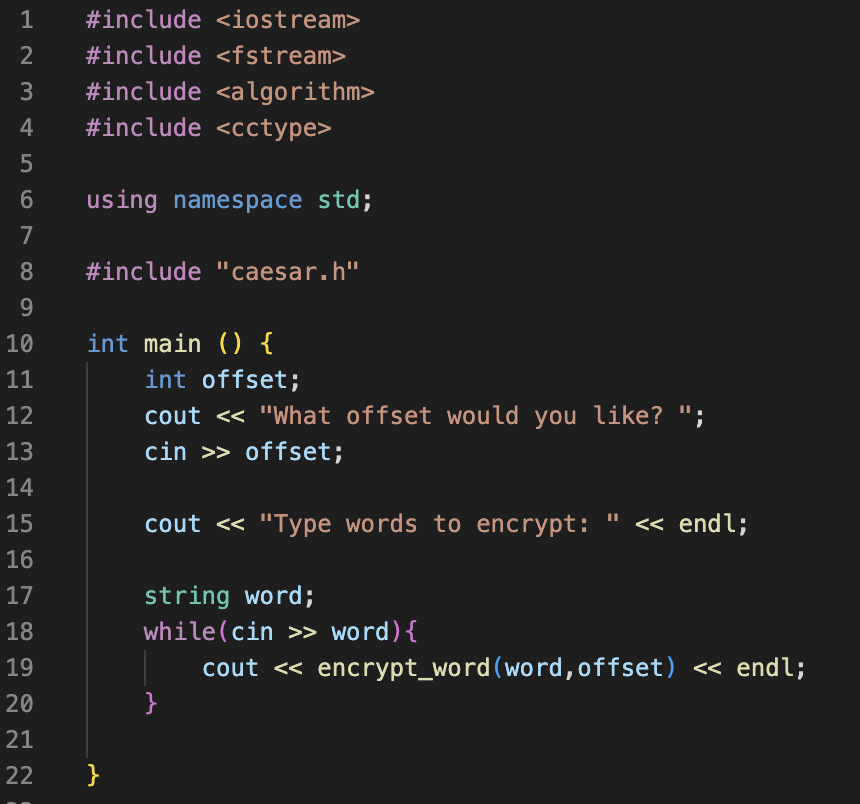
1. At the top of encryptCaesar.cpp and caesar.cpp, we #include "caesar.h".
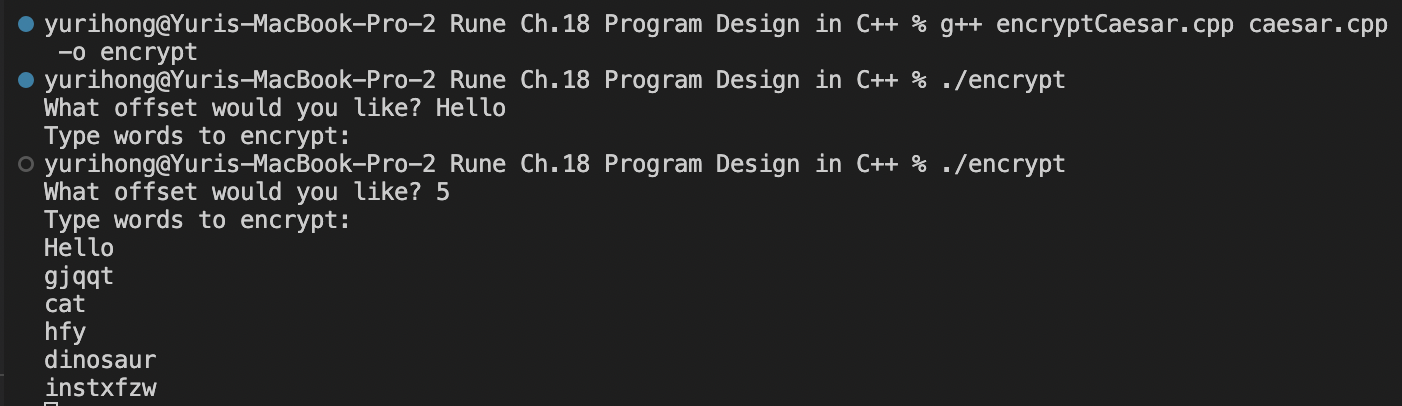
To compile the program, use g++ encryptCaesar.cpp caesar.cpp -o encryptDoc.
2. You can put using namespace std; at the top of all of the .cpp files. However, you should never put using namespace std; at the top of a header file.
3. If you don’t have using namespace std; at the top of the file (like header files), then you will need to preface many keywords (string, vector, etc.) with std::.
Ex) instead of writing string, you will need to write std::string.
void doSomething(std::string inputString);
III. Unit Testing
1. Unit Testing
(1) Programs often use many functions working together.
(2) In unit testing, we test each function individually to make sure it behaves as it should according to its interface.
(3) Generally, this amounts to:
- Running the function with a bunch of inputs
- Verifying it produces the right output for each one
2. Writing Unit Tests
(1) A unit test checks the behavior of an individual component or function.
(2) You can write unit tests in a separate file with its own main function.
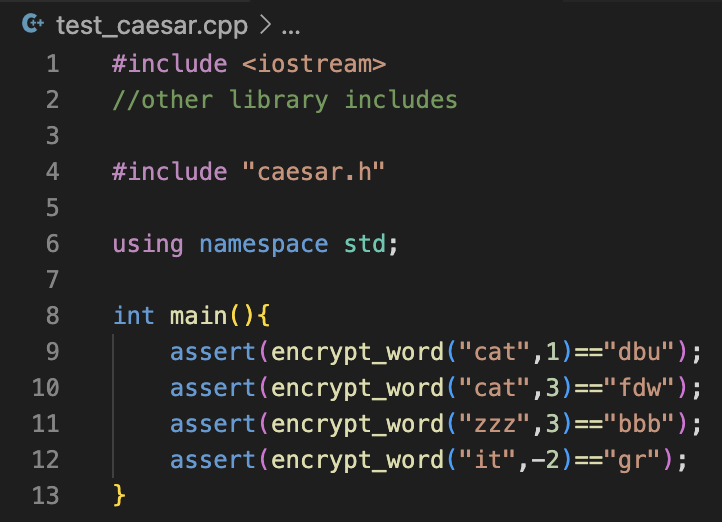
=> g++ test_caesar.cpp caesar.cpp -o test_caesar
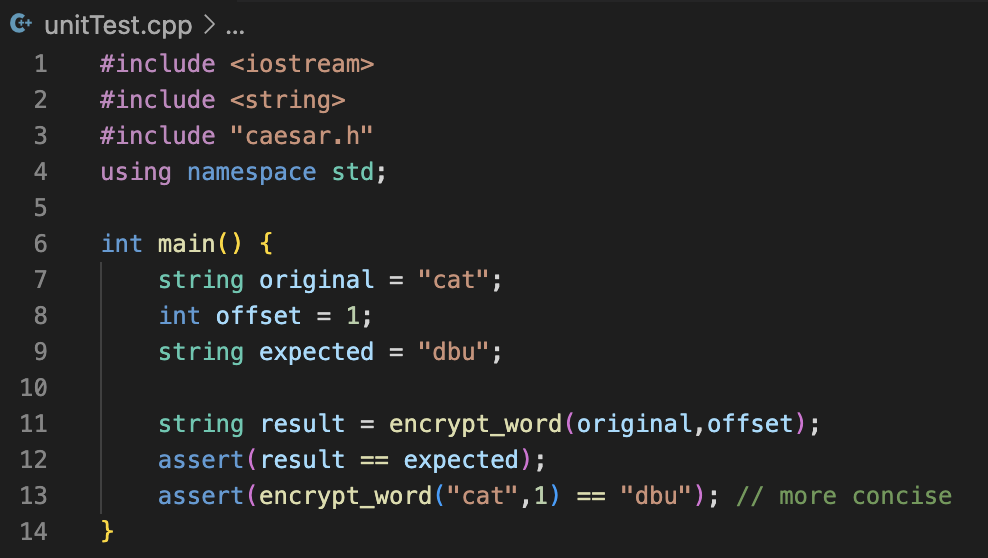
We often use the assert function (built-in C++ function), which ends the program with an error message if its input is not true.
A good way to organize unit tests is to write them in a separate file with its own main function.
EXERCISE) Unit Testing
In particular, you should focus on writing tests for special cases or edge cases - these are sets of inputs that are in some ways trickier than normal or on the boundaries of what is allowed. For example, here’s a variety of suggestions for things you might try testing:
- An offset of 0
- A negative offset
- An offset of exactly 26 (should be no change)
- An offset larger than 26
- Cases that wrap around the end or the beginning of the alpha

(1) You may have found that a test like this caught the bug:

You will see the problem is that the pos = (pos + offset) % 26; allows the position to become negative. In this case, pos + offset yields -2, which remains the same after modding by 26.
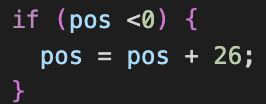
(2) We can fix this by adding a conditional after the position calculation:
This ensures that any negative number is adjusted 26 letters forward to its positive equivalent.
The -2 becomes 24, which is the position of y, as desired.
3. Unit Testing with Doubles
(1) If you have a function that returns a double as a result, you need to take some precautions to make sure you don’t run into issues with floating-point precision.


=> Computers can’t perform floating point math perfectly.
Limited memory means limited precision.
(0.030000004 is not equal to 0.03)
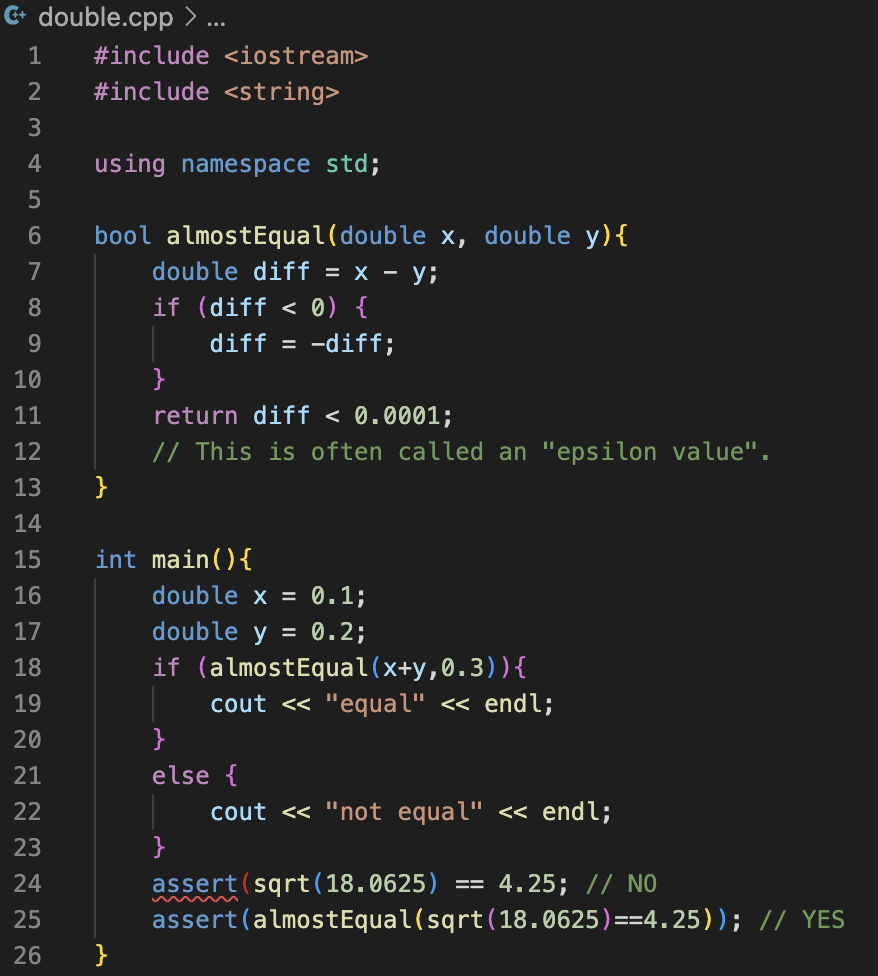
(2) It’s not safe to use == or != with floating point numbers.
- The results of computations that should be equal may not turn out to be literally equal, due to limited precision.
- Instead, check whether the numbers are very close.
Ex)
IV. Top-Down Design
1. Top-Down Design
Top-down design starts by looking at the big picture of what the end result will be, and then breaks it down into smaller steps after that.

To begin the top-down design process, we wrote some pseudocode to sketch out the high-level steps of the program. Then, we were able to convert some of our pseudocode to code and identify any remaining helper functions that we need to write.
Note
We identified two new functions that we need to implement: loadDocument() and writeDocument(). Let’s add these functions in a new module, document.cpp and document.h.
2. Finishing up the Caesar Cipher Program
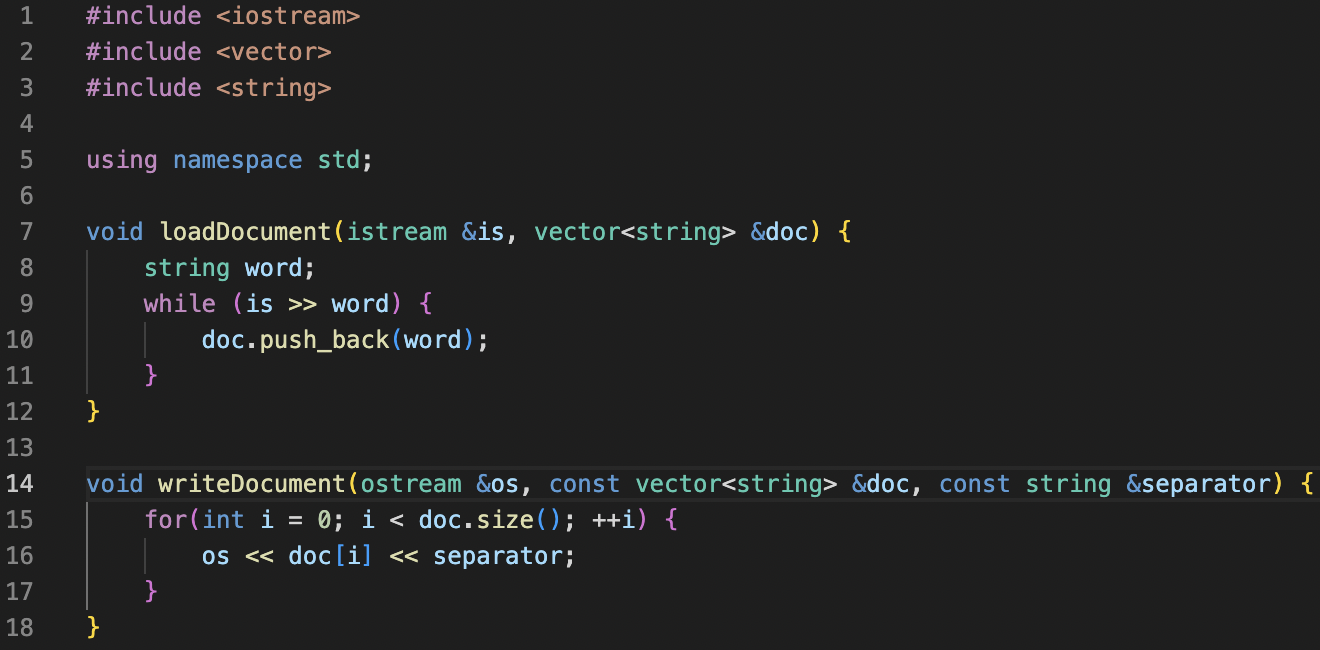

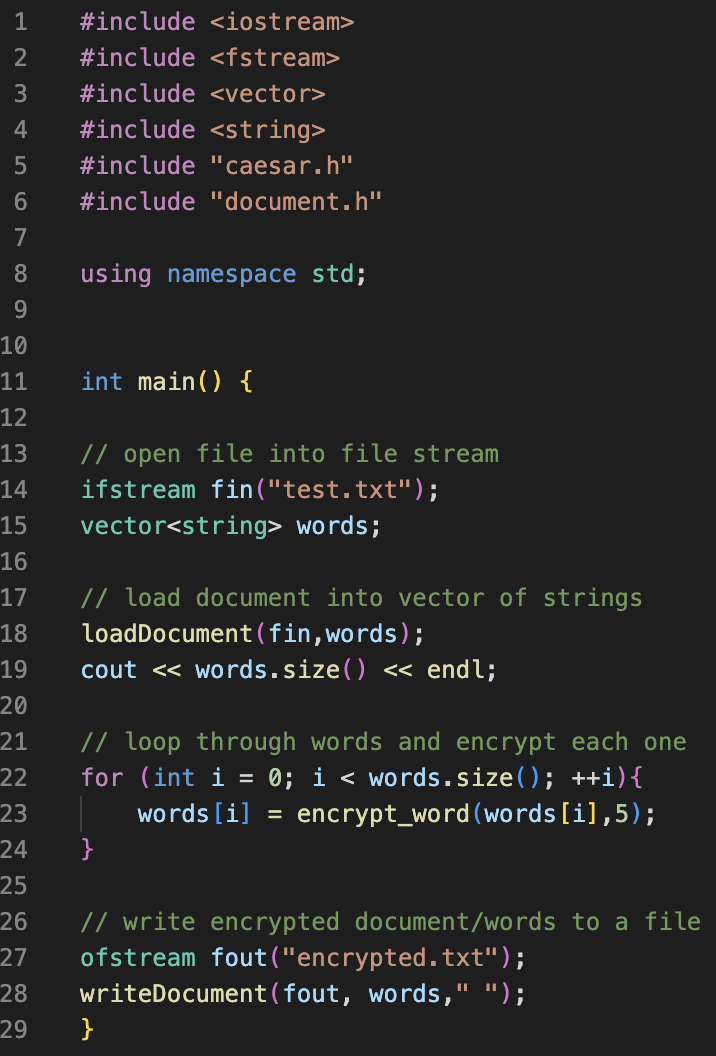


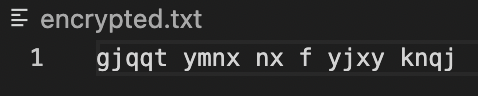
(1) We implemented the loadDocument() and writeDocument() functions, and tested out functions. When we tested our functions, we saw that they didn’t work correctly.
(2) Debugging: the process of hypothesis testing. We come up with an idea of what could be wrong, and then we determine what information we need from the program to see if our idea was correct. We can use cout statements to print out useful information to help us narrow down where the problem is.
* Stream parameters are always passed by reference (&) because passing by value would make a copy, and making a copy of a stream doesn’t really make sense.
V. Cracking the Code
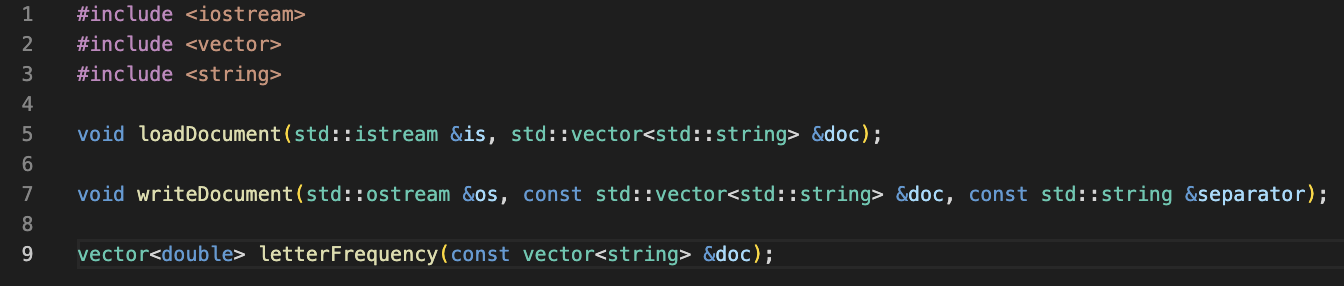
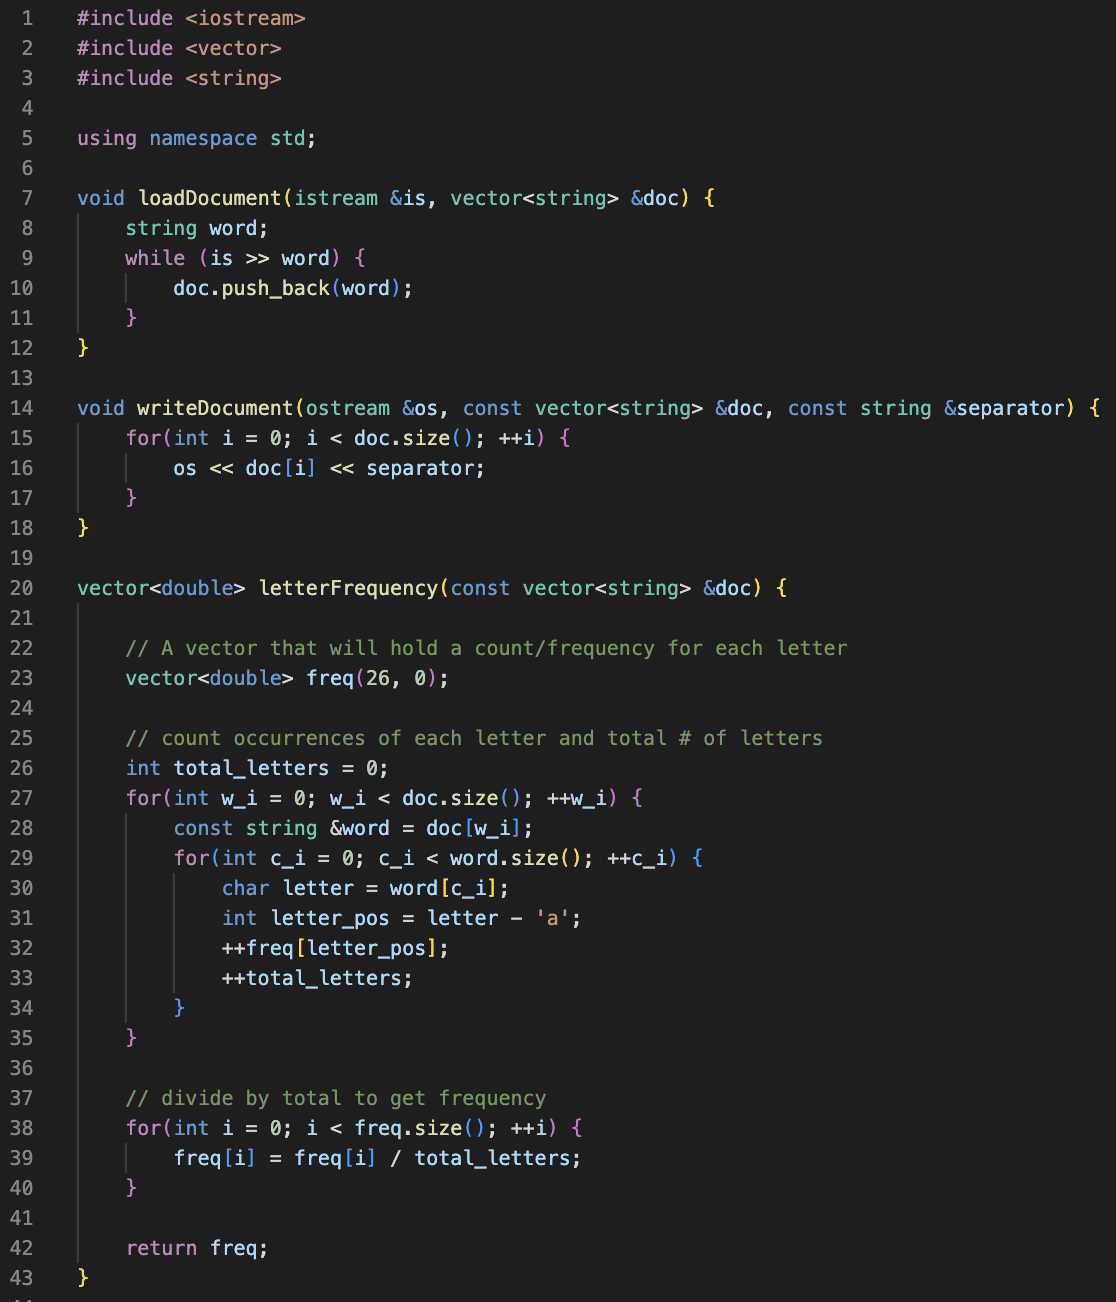
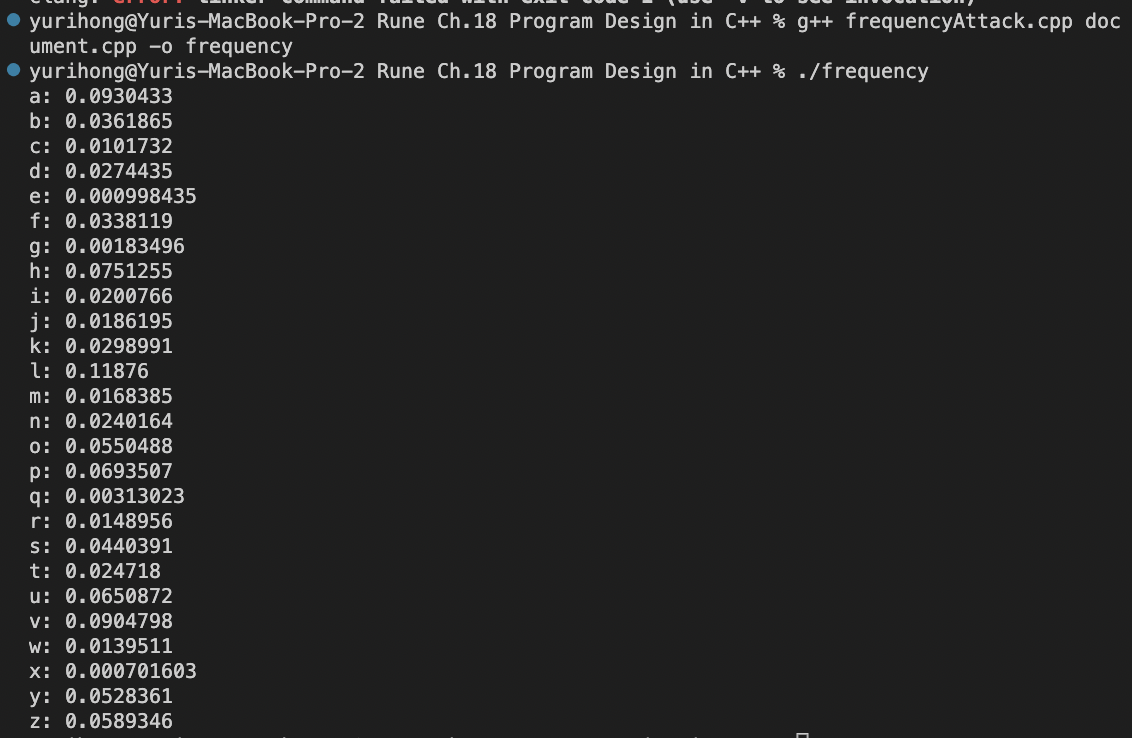
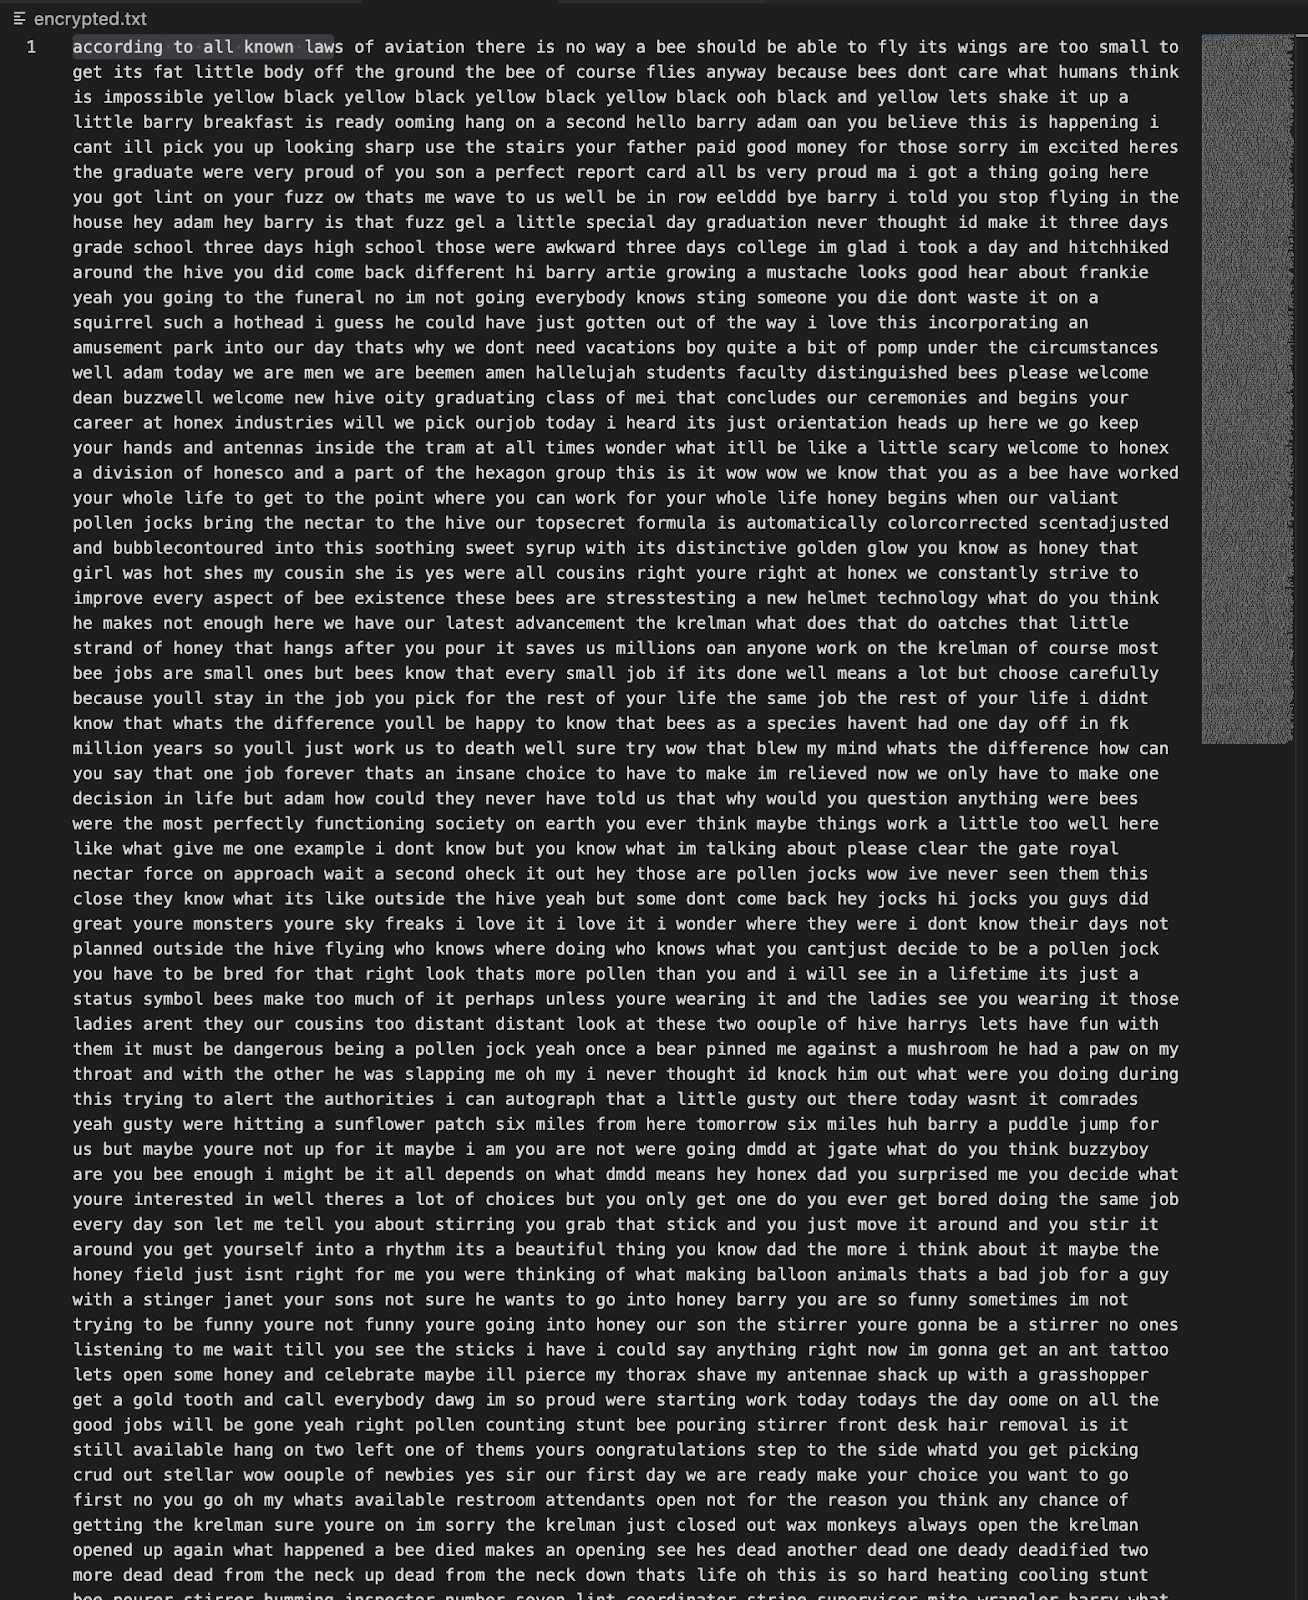
We used a frequency analysis attack to decrypt the notes. For this attack, we count up the frequency of each letter in the encrypted document, and then we match the most common letters in the encrypted document with the most common letters in the English language. This lets us calculate the offset used in the Caesar Cipher.
IV. Summary
1. Bottom-down design starts by identifying specific features that we’ll need in our program and then writing functions that accomplish these specific features. Top-down design starts by looking at the big picture of what the end result will be, and then breaks it down into smaller steps after that.
2. One way to organize larger programs is to write our own modules of code. A module contains a specific set of functionality in your code. A module usually consists of a .cpp file and a .h (header) file. The header file will contain function prototypes, while the .cpp file will contain the implementation of these functions.
3. To compile a program with multiple modules, all of the .cpp files must be specified in the compilation command. Header files are never specified in the compilation command.
4. Unit testing is the practice of testing each function individually to make sure it behaves according to its interface. We often do this using the assert function.
5. It’s not safe to use == of != with floating point numbers. Instead, we can check whether the numbers are very close.
6. Debugging is the process of hypothesis testing. We come up with an idea of what could be wrong, and then we determine what information we need from the program to see if our idea was correct. We can use cout statements to print out useful information to help us narrow down where the problem is.
'[Umich] COE Core > ENGR 101 (Matlab, C++)' 카테고리의 다른 글
| [Notes] Ch.20 More Data Structures (Runestone) (0) | 2022.12.06 |
|---|---|
| [Notes] Ch.19 Structs (Runestone) (1) | 2022.12.06 |
| Umich ENGR 101 Project 4 Overview (Summary) (0) | 2022.12.01 |
| [Notes] Ch.17 Vectors in C++ (Runestone) (0) | 2022.11.18 |
| [Notes] Ch.16 Strings, Streams, and I/O (Runestone) (0) | 2022.11.18 |


댓글